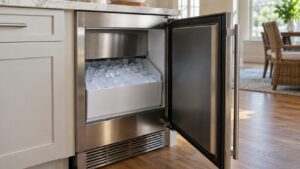
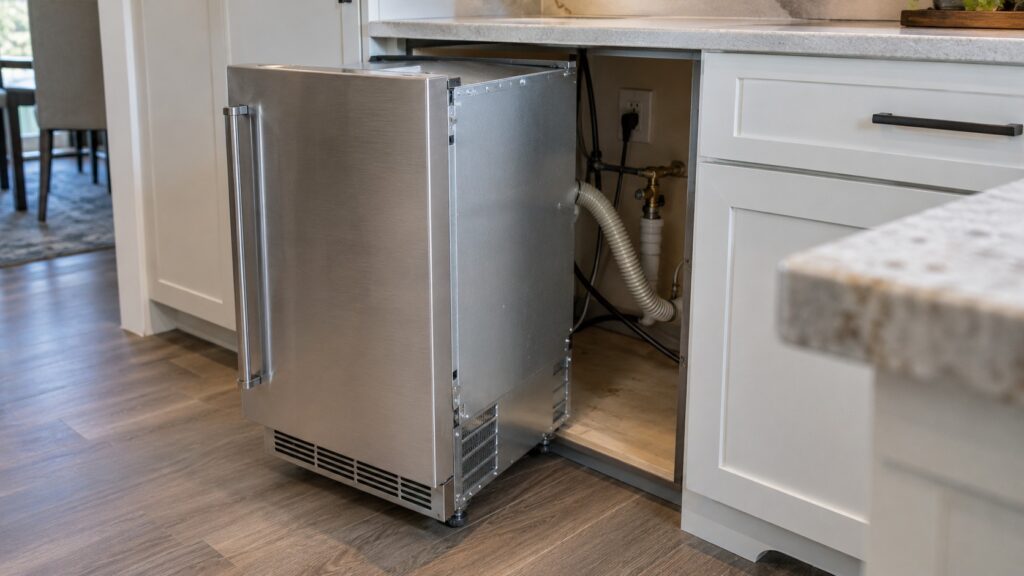
A Whirlpool ice maker drain line has one job: carry the machine’s waste water away without letting it back up. On most undercounter models that means a gravity drain that falls the whole way to the waste connection, with no kinks, no sags that trap water and no connection lower than the machine’s outlet. Our Whirlpool ice machine installation guide calls the drain the requirement most often discovered late, so decide how the water will leave before the cabinet is built or the machine is slid into place.
What does an ice maker drain line carry?
An undercounter ice maker produces waste water all the time, not only when something is wrong. Water leaves the machine after each harvest, as ice in the bin melts and when the reservoir purges. Our Whirlpool ice machine installation guide says that water has to go somewhere, and on most models it goes by gravity, so the drain connection has to sit below the machine’s outlet and fall the whole way to the waste.
The plain-language reading is that an undercounter ice maker is the one kitchen appliance that needs a supply, a drain and ventilation all at the same time, and it works for a season and then fails when one of them is slightly wrong.
Where does a gravity drain need to end up?
In the cabinet run, the drain needs a waste connection that is lower than the ice maker’s outlet. A floor drain, a laundry or utility sink drain or a properly installed drain connection in the wall can serve, depending on local plumbing code. In a run of base cabinets with no floor drain and nothing accessible below counter height, the same installation guide says this is a plumbing job rather than an appliance connection. That is the situation where the decision should be made at the planning stage, before the cabinets are fixed.
Plumbing codes can require a trap, an air gap or a particular connection type for an appliance drain. We cannot tell you which applies in your area, and the owner’s manual for your model lists what the ice maker needs. A licensed plumber can make the connection and make sure it meets local rules.
How should the drain hose be laid?
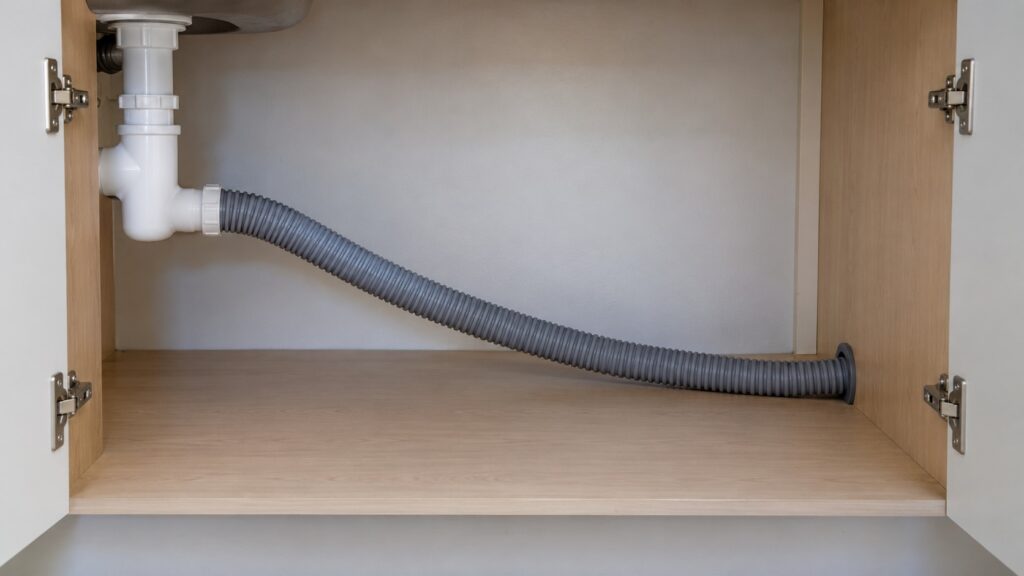
Keep it simple. Lay the hose in one continuous downhill run from the machine to the waste connection. Avoid kinks, sharp bends and anything that squeezes it, such as a hose trapped under the machine’s feet or against the cabinet wall. A sag in the middle of the run holds a pool of water, which can grow slime or block the flow. If the hose is longer than it needs to be, do not coil the extra; shorten it or lay it out straight, per the manual.
Fix the end of the hose so it cannot slip out of the waste connection, and make sure the connection itself does not sit higher than the machine’s outlet. Pull the machine forward only as far as the hose and supply line allow, and check that neither is pinched when you slide it back.
What if there is no drain below the machine?
Some models carry the pump inside. Our model pages list a built-in drain pump on the WUI95X15HZ and the legacy GI15PDXZS, and a gravity drain with no pump on the WUI75X15HZ. Other models accept an add-on condensate pump, which lifts the water instead of letting it fall. Our installation guide notes that a pump is a component that can fail, and a failure puts water on the floor. Check in your owner’s manual whether your model accepts a pump, and which one. An add-on pump should be fitted to that model’s instructions, and its power and drain connections are a plumber’s or electrician’s task, not something to improvise under a counter.
If there is any doubt, a plumber can bring a drain to the cabinet. A gravity drain has no pump to fail, which is why our guide treats it as the normal arrangement.
How do you check the drain after installation?
With the water supply on and the machine running, watch the drain hose and its connection during the first cycle. Look for drips at the machine, at the hose joint and at the waste connection. Check the cabinet floor under the machine for dampness an hour later and again the next day. Keep an eye on the ice bin: if the bin is wet at the bottom and the machine is not draining well, the machine may not be level. Our installation guide says an out-of-level machine will not release its slab cleanly or drain fully.
Level the machine and look at the base grille too, because a machine that is boxed in or has a blocked grille will struggle even with a perfect drain.
What goes wrong with a bad drain line?
A blocked or kinked drain can leave water in the bin, produce cloudy or thin ice, make the machine run slowly or push water out onto the floor. Slime and mineral scale can build in a drain that does not run freely. Our ice machine cleaning and descaling guide explains the regular cleaning, and the Whirlpool ice machine not making ice guide is the place to start if production stops. Look at the model page for the WUI75X15HW, which lists a 25 lb storage bin, Clear Ice Technology and a Self-Cleaning cycle.
If you find water on the floor near an outlet, switch off the breaker at the panel while standing on a dry floor and never pull a plug from a wet outlet.
When should you call a technician or a plumber?
Call a plumber for any new drain, a change to the waste line or a connection that leaks. Call an appliance technician when the drain is right and the machine still holds water, makes poor ice or leaks from the cabinet. Do not remove the machine’s panels yourself. Our Whirlpool ice maker repair page explains how a visit works.