A Whirlpool dishwasher high loop is the arch you give the drain hose under the sink: the hose runs up to the underside of the countertop and only then drops to the disposal or the sink drain. The arch stops dirty sink water from siphoning back into the tub. A missing or collapsed loop is a common reason for standing water, odor and slow draining on a dishwasher that was just installed.
What is a high loop on a Whirlpool dishwasher?
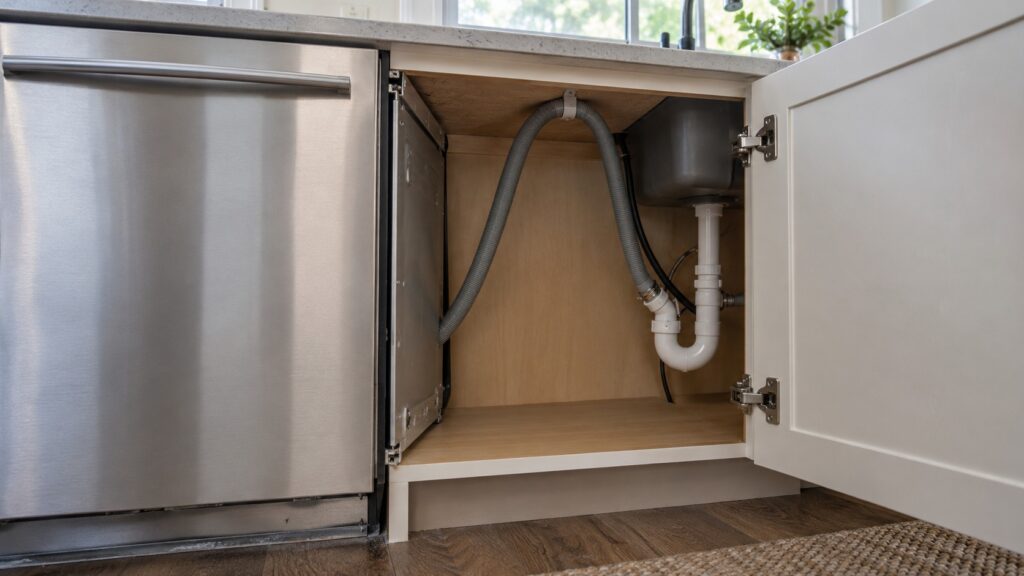
The drain hose of a built-in dishwasher is a long, ribbed tube that leaves the pump at the bottom of the unit and ends at a connection under your sink. The high loop is how you route it: instead of letting it sag to the cabinet floor and then climb to the drain, you lift it to the underside of the countertop, fasten it there and let it drop from that point. Our Whirlpool dishwasher installation guide describes the same step: route the hose up to the underside of the countertop before it drops to the disposal or the drain, which is what stops dirty water from siphoning back into the tub.
Think of the arch as a one-way hint for gravity. Water leaves the dishwasher pump with force and climbs over the top. When the pump stops, the water on the sink side cannot climb back over the arch into the tub.
Why does a missing high loop cause drain problems?
Without the arch, the hose is a low, open path between your sink drain and the inside of the dishwasher. If the disposal or the sink drain backs up, or if water in the line siphons, wastewater flows toward the lowest point, which is the tub. The result is a dishwasher with a puddle in the bottom after every cycle, a stale smell and dishes that never come out as clean as they should. The same pattern also appears as an F9E1 drain failure, which our Whirlpool dishwasher will not drain page describes together with the other usual causes.
Not every drain problem is a loop problem. A clogged filter in the tub, a clogged disposal or a jammed pump produces the same puddle. Check the loop first only because it takes a minute to see.
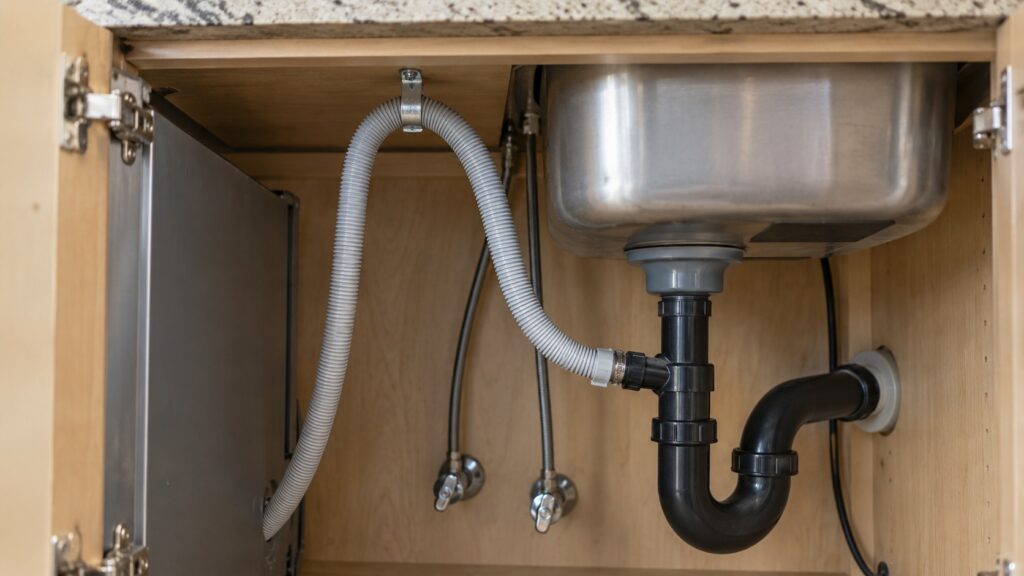
How do you check the loop without pulling the dishwasher out?
Do this from the sink cabinet. Switch off the dishwasher’s breaker at the panel first, standing on a dry floor, because there are electrical connections nearby. Then clear the items out from under the sink and look along the back wall for the ribbed hose. You should see it climb to the underside of the countertop, be held there by a hose clamp, strap or bracket, and then drop to the disposal inlet or the sink tailpiece. If instead it runs low along the cabinet floor, or hangs in a drooping curve below the sink basin, the loop is missing or has slipped.
A loop that has slipped down over time is common. Hose clamps loosen, cabinet clutter pushes the hose and the loop collapses. Re-hang it to the underside of the countertop and secure it so it stays there. If you can only reach part of the hose, leave the rest and call us.
What about an air gap?
Some local plumbing codes require an air gap, a small fitting that sits on the sink or countertop and breaks the connection between the sink drain and the dishwasher hose. Our installation guide says to make a high loop or an air gap as your local code requires. We cannot tell you which one your area requires, because that depends on your local code and inspector. Ask the person who installed the unit, or the building department. If the code calls for an air gap, a high loop alone will not satisfy it.
Adding an air gap means working through the countertop and the sink plumbing. That is a job for a plumber or an installer, not a weekend task for most households.
What else goes wrong at a new installation?
Three things show up beside the loop. The first is the garbage disposal knockout plug. Our installation guide lists the disposal knockout among the usual causes: a new disposal can have a plug in its dishwasher inlet, and if it is not cleared before the drain hose is attached, the water has nowhere to go. A dishwasher that fills fine and then will not drain on day one is the classic sign. The second is over-tightening a water fitting until it cracks, which leaks under a cabinet you cannot see into. The third is a unit that was never leveled or never fastened to the countertop or cabinet, so the door seal fits unevenly or the unit tips when you pull out a loaded rack.
The new dishwasher also needs a test cycle with someone watching: run a full cycle and watch for drips at the door, under the sink and on the floor in front of the unit, using a flashlight. Do not remove the kick plate or any panel yourself, because live electrical parts are behind them; leave that to the installer. Then confirm the tub is empty at the end. Our Whirlpool dishwasher leaking guide covers what to do if a drip appears.
When should you call an installer?
Tying into the plumbing and the electrical supply, adding a circuit or fitting an air gap is best done by a professional; our installation guide says the same. Call if the hose is cracked or kinked, if you cannot reach the connection, if the unit has been leaking, or if the disposal side needs work. Turn off the water supply and the breaker at the panel before any connection is touched; if there is water near the outlet or wiring, do not touch anything and have the breaker switched off from a dry spot. Our dishwasher repair page explains how a visit works, and you can book a visit online.